Microsoft is also very eager to push the Windows 10 update to maximum users. There are a lot of new features in Windows 10. It has a better start menu as well as Microsoft’s Voice assistant Cortana built right into it. Along with all this, there are many other features.
Windows 10 comes with inbuilt security software that works against viruses and malware, which is Windows Defender. Windows Defender is one of the best free antivirus protection available for your windows PC. Yet some users want to disable Windows Defender.
If you don’t know How to disable Windows Defender permanently in Windows 10, we have some simple steps for you. You can rather follow these simple steps and easily disable Windows Defender permanently in Windows 10.
After disabling Windows Defender in permanently in Windows 10, you can take security matters into your own hands and install any anti-virus software according to your preference.
Content
Why Disable Windows Defender In Windows 10?
Many users find it very useful and depend solely on Windows Defender for their security. Yet, to be honest, there are many better security programs for your PC available. You will rather want to install a paid antivirus if you have any critical data on your PC.
Then, running both applications may drain another of your PC’s resources, and if you have a laptop, it will surely affect the battery life. In such case, it is recommended to disable Windows Defender permanently in Windows 10 using the steps given below.
Some users also disable Windows Defender permanently because other anti-virus softwares provide better functionality and more flexible working options than Windows Defender. So it is just the user’s preference of what security software they want to use.
How To Disable Windows Defender Permanently In Windows 10 Or 8.
Here we have given some simple steps which you can follow to disable Windows Defender permanently in Windows 10.
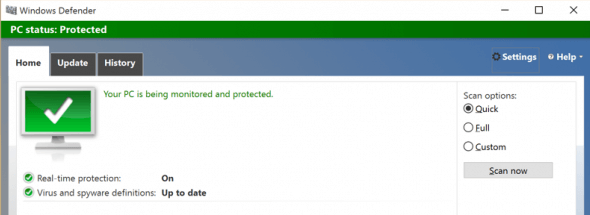
Step 1: Search for “Windows Defender” in the start menu search box.
Step 2: Open Windows Defender.

Step 3: Click on “Settings” in the top right of the window.
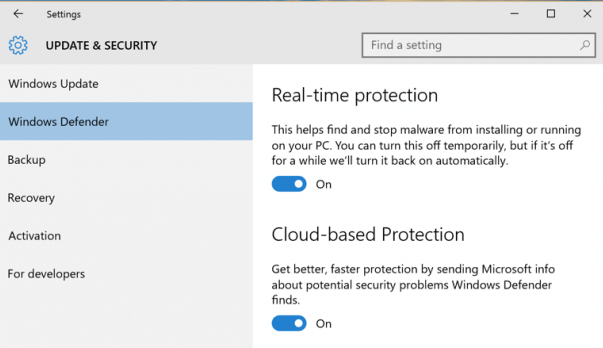
Step 4: From here, you will be taken to a Settings page in Windows 10. Then you will see options to turn off Windows Defender permanently in Windows 10.
Step 5: Turn Off the toggles for Real-Time Protection, as well as Cloud-Based Protection. Then, you are done.

Keep Windows Defender Permanently Disabled.
After you have successfully turned off windows defender, it’s time to keep it off permanently. Also, you can do it by following the steps given below.
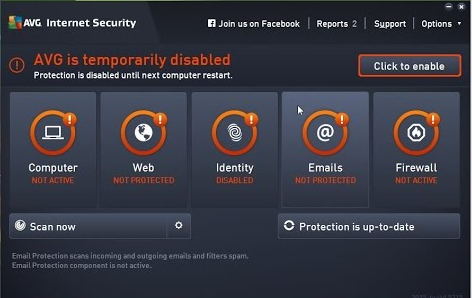
Step 1. Install a light third party anti-virus software like AVG from the Download Button.
Step 2. After the installation is complete, go to the interface of your anti-virus application and “Turn Off” the security or protection scanning.

Now you have successfully disabled Windows Defender permanently in Windows 10. So, you can freely install any other anti-virus program on your windows PC without worrying about performance and battery life of the laptop.
Watch YouTube Video Tutorial
Hence, this was a simple guide on disabling Windows Defender in permanently in Windows 10. We hope it is useful for you and you find it intuitive. For any help or suggestions, feel free to write to us in comments below.
