Users can change proxy servers as they change their IP Addresses to maintain their privacy. You can browse any website on the internet behind a proxy server and no one will ever come to know what you were surfing. As more and more people surf the internet using their smartphones nowadays. Most of them are Android-based smartphones, so I am going to list the methods to Change the Proxy On Android.
To Change the Proxy on Android, make sure you are using a newer flavor of Android. As Android version below version 2.3 also known as Gingerbread does not allow users to Change their Proxy. But Still, You can change the proxy on the browser The method I am going to list below works with all devices. User does not need to download or install any Third-party application on their smartphones. Users can change proxy settings using the settings menu of their Android Smartphone.
Why Do You Need To Change Proxy?
There are many prying eyes on the internet. They can steal your important information such as usernames and passwords of social media websites, credit card details, bank details, and much more. Your data becomes more vulnerable if you are accessing the internet via public hotspots.
You also need to change the proxy if you do not want anyone to know what you are viewing and surfing on the mighty internet. Sometimes you see an error message that says that you can not access this website as your govt. or ISP has blocked that website. You can access those websites by changing proxy settings on your Android smartphone.
How To Change Proxy On Android?
The following are the steps the user needs to follow to Change the Proxy on his Android smartphone.
- Open Settings of your smartphone.
- You will find Wi-Fi at the top of the list. Open it.
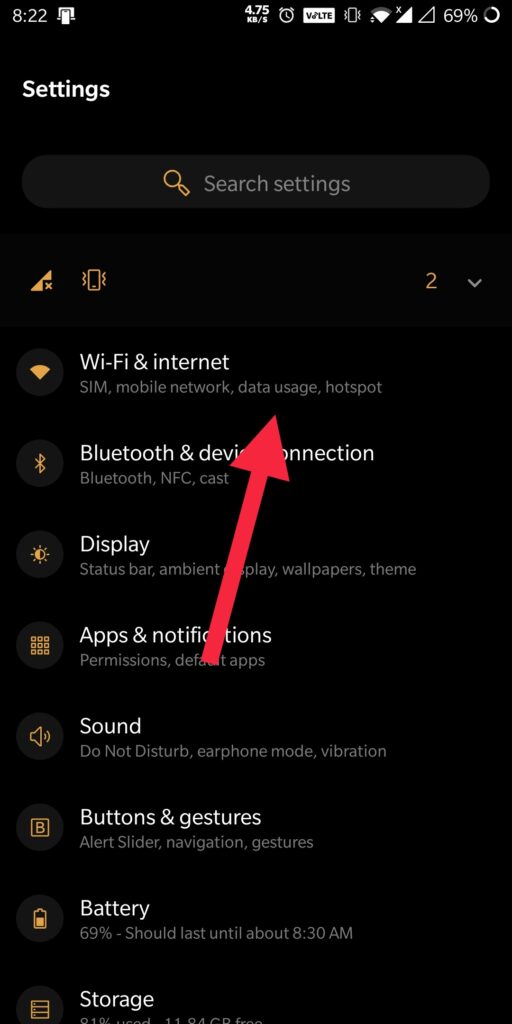
- Now you need to Tap and hold on to the desired Wi-Fi hotspot.
- Tap and hold on to its name for some time until you see a context menu.
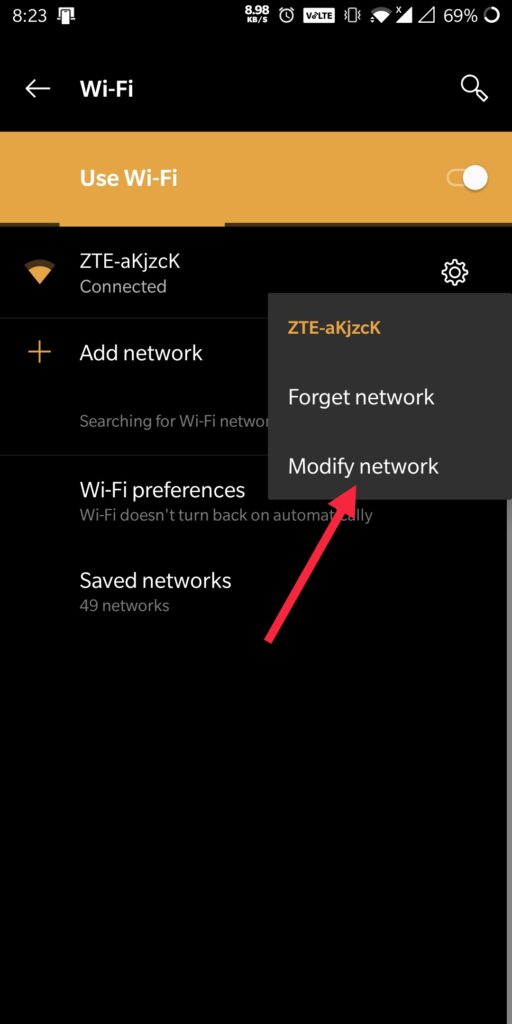
- Tap on Modify Network.
- Now you need to scroll down to see an option Show Advanced options.
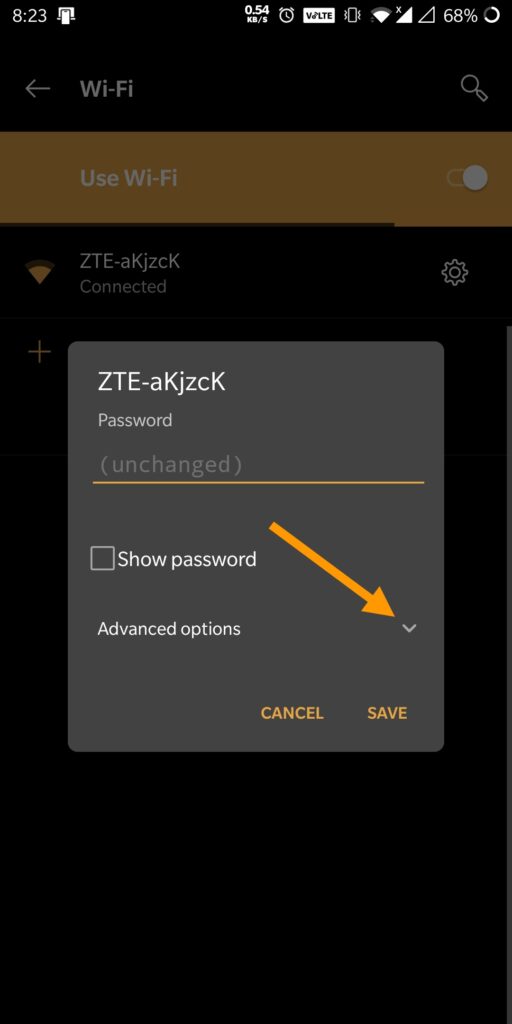
- Check that box and you will see further a list of options will arrive.
- Now under the sub-heading Proxy Settings.
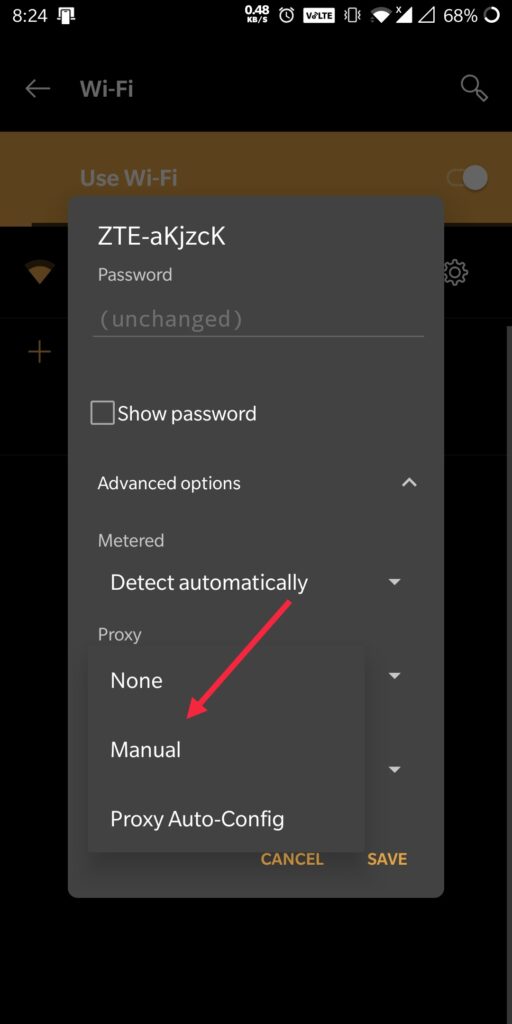
- Tap on None to see further options.
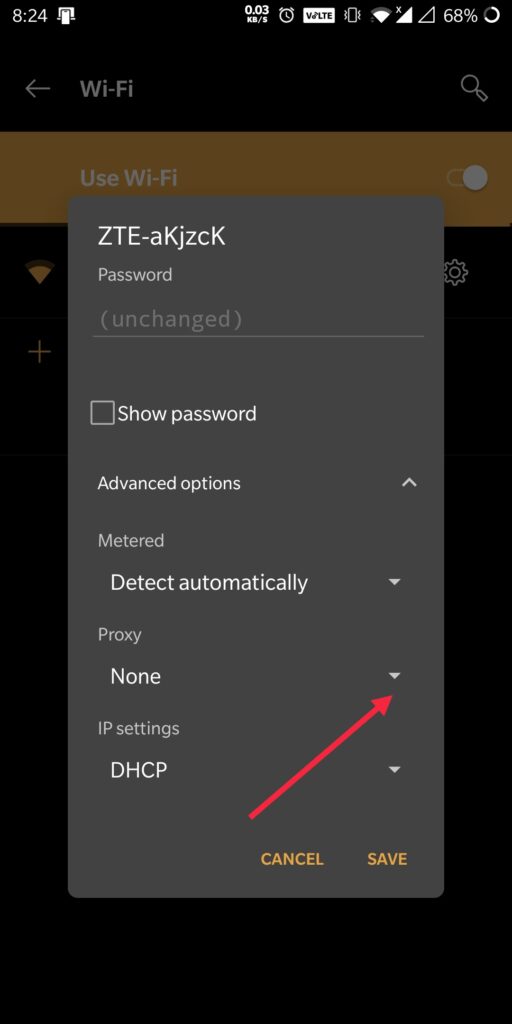
- Now tap on Manual.
- Now you will see 3 sections that you have to fill accordingly which are Proxy Hostname, Proxy Port, and Bypass Proxy.
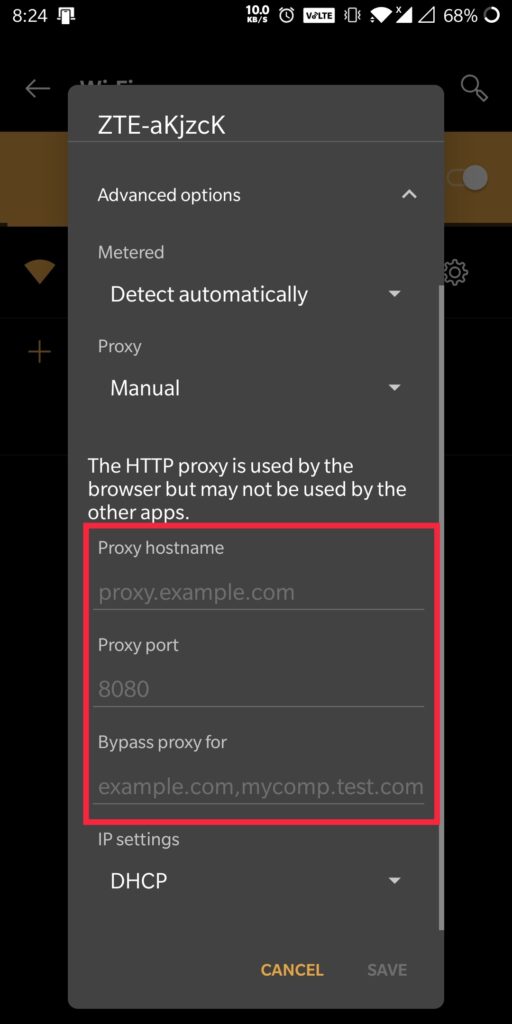
- Before you fill all the sections you will see Save Button is greyed out.
- Fill in all 3 sections to save the settings.
- Now tap on Save.
Following the steps written above, you can change the Proxy of your Android smartphone. The user-friendliness of Android OS is proved once more. Now access as many restricted websites as you want to. Surf all the websites you ever wanted to without anyone knowing about it right from your Android Device. If you like our work appreciate it in the comments sections or if you have queries ask us in the comments section below.
